My name is Juliette Wileman (0875), and this is my A2 Media Studies Coursework blog. I am working in Group 3 along with Audrey King Lassman (0397), Brandon Poonwasie (0660), and Chrystal Li (0470).
To navigate around my blog, use the labels on the left side, below the Labels heading.
Thank you!

Website

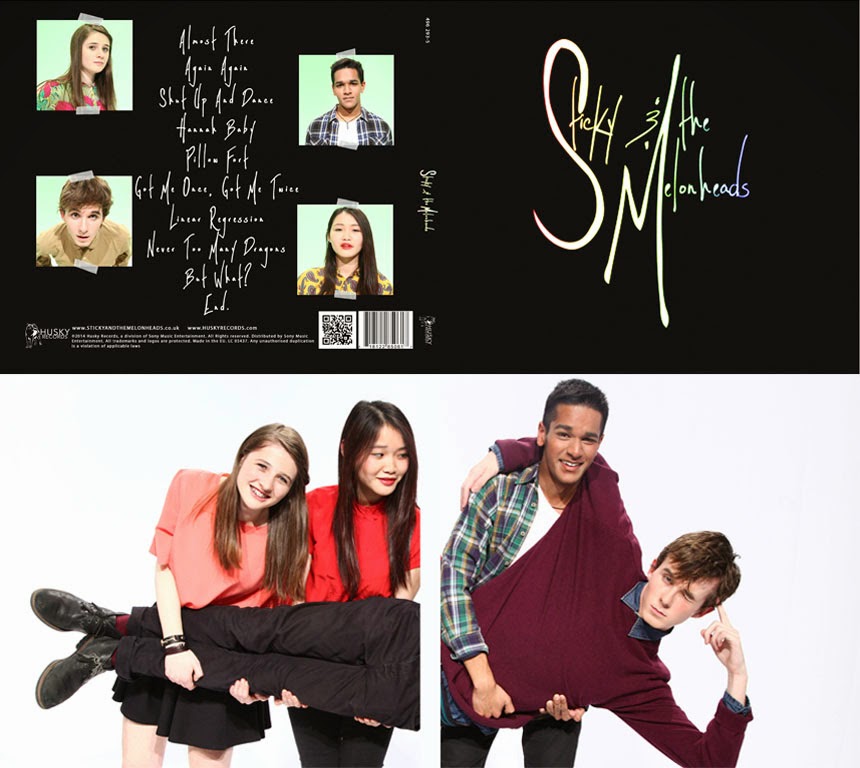
Album Art Digipack

Album Art Digipack

Music Video

Friday 25 October 2013

Paranormal Activity Sweded

For this activity we were given the task of sweding a well-known film. My group (Harry Kettenis, Enya Phillips and Josh Stevenson) decided to swede Paranormal Activity.

Our marketing techniques were:

The Poster

The Trailer

The Blooper Reel


The Film Itself

I enjoyed making this film because we had a lot of fun during the shoot, and I learnt from the experience.

Sunday 13 October 2013

Dexter Title Sequence Re-Edit


1. Summarise the conventions of title sequences that were most important to this task. 
   Film openings need to inform the audience of who is behind the film, and there are certain titles that must be in the sequence, such as who directed the film. 
   The titles themselves should add to the sequence, not ruin it. Titles can draw attention to certain areas of the frame, or be embedded in the environment itself. Titles can also be interacted with, such as an actor running through it and breaking it, like in Zombieland for example. Creative choices can either hinder or improve the sequence: the titles should fit the genre with the choice of font and colour.
   In the sequence itself, characters, themes and/or ideas should be introduced, as well as a clear sense of genre, so as to give the audience an idea of what the show is like, and what they can expect. The opening sequence should capture the audience's attention, such as showing a morning routine, or a montage of the characters, or even hint at events that will happen.

2. How did your group plan to edit the title sequence? (consider timings, industry requirements etc). 
   Due to having very little time to complete the task, we quickly watched through the sequence, drawing out a rough storyboard of what shots we wanted to put titles on. We then decided on a font an colour scheme that fit the genre of the sequence, then got straight into editing. We knew that we had to include certain titles due to industry requirements, but due to timings we didn't manage to get that many in.

3. Explain the creative decisions made by your group. 
   We decided to put the titles in places that were noticeable, but did not distract too much from the action of the shot. At first we wanted the titles to be integrated into the environment, but due to timing we weren't able to do this as well as we had hoped. The titles themselves were red, with smaller titles in white, to make sure they stood out from the background and fit with the thriller genre. We chose a font that was legible, yet still fit with the genre by being quite bold. We decided on that font as the titles need to be easy to read for the audience.

4. How does your re-edit compare to the original?
   The original edit is better than ours, as it has all the necessary titles, and was not as overly-ambitious as ours. As we wanted to do more complicated ideas, we spent too long trying to complete them rather than get the right amount of titles in. However, I think our ideas would have been good if we were able to complete them, and whilst they may not have been as good as the original, it would have made our edit better.
   If I could improve our edit, I would firstly complete adding titles so it meets industry requirements. I would also spend more time making the titles fit into the background, such as bending around the edge of the pan for example. I would also make the titles more interesting, such as having the actor interact with the titles; they could be uncovered when he lifts his face in front of the mirror, or being cut through the middle with the blood orange. With the time limit we had, this wasn't possible, but I think our edit was fairly good with the time that we did have.

Thursday 10 October 2013

Sweded Films

A sweded film is the sumarised recreation of popular films using limited budgets and a camcorder. The process is called sweding and upon completion the film has been sweded. 

Origins: In the Michel Gondry film Be Kind, Rewind (2008), the character Jerry accidentally erase the videotapes at Mos Def's video rental store, and the pair remake all the films themselves. These versions become popular with customers, who are told they take longer to arrive and cost more because they come from Sweden, hence the term 'sweded'.

After watching sweded films on YouTube, I found these to be the ones I enjoyed most:


A good films to swede would be Mean Girls, as it is set in a school which is where we will be filming, it is well known and requires very little props.

Saturday 5 October 2013

Evaluation Of Preliminary Task


For the preliminary exercise, we were set this brief:
Continuity task involving filming and editing a character opening a door, crossing a room and sitting down in a chair opposite another character, with whom she/he then exchanges a couple of lines of dialogue. This task should demonstrate match on action, shot/reverse shot and the 180° rule.


1) Who did you work with and how did you manage the task between you?
I worked with Abirami Logeswaran, Harry Kettenis and Josh Stevenson, and we worked as a group to make decisions such as actors and costumes. I pitched an idea and we built on it as a group. We planned the sequence in a 40 minute time period, completing the storyboard and shooting schedule together. Josh was chosen to be an actor as he takes AS-Level drama, and I was the other actor as we wanted a female antagonist, and I was more comfortable with acting than Abi was, and the group didn't want to force someone to do what they didn't feel comfortable with.

2) How did you plan your sequence? What processes did you use? What theories did you try to take into account?
To plan our sequence, we firstly had a group discussion and decided on the plot, then made sure we involved the key aspects given to us in the brief. Once we had established these shots, we added in a few extras to improve the continuity and add some personality to the sequence. We firstly drew out a storyboard, then carried out a walkthrough so we could iron out any problems, then followed this up with a shotlist in the order of what we were shooting in. One problem from the walkthrough was lighting, as what we wanted to do (use a spotlight) was too complicated and time consuming. Once the shotlist was complete we planned out costumes, that fit to our genre (thriller). I wore all black and Josh wore a dishevelled suit. When planning our sequence, we tried to include multiple theories, such as:
  • narrative flow
  • the 180° and 30° rule
  • eye line matching
  • shot/reverse shot
  • match on action.
We found that having a storyboard and shot list was really useful during shooting as we had clearly mapped out what needed to be done. This ensured that we finished well within the time limit with minimal stress.

 3) What technology did you use to complete the task, and how did you use it?
 We used the Canon HV30 camera, a shotgun microphone, Mini DV Tape, Sennheiser HD 201 headphones and Adobe Premiere Pro to edit. 
Canon HV30: we recorded onto the Mini DV Tape, and changed framing and angles to help narrative flow. The shotgun microphone picked up any audio for the shot, and we used the Sennheiser HD 201 to hear this.
Adobe Premiere Pro: we viewed the clips and narrowed them down to the shots we wanted by placing them in a separate bin. We then cut down the clips using in and out points and dragged them onto the timeline using 2 video tracks, so the shots alternated between track 1 and 2. Once we established the shot order, we then cut down the clips further so the clips were seamless, and didn't hinder narrative flow or continuity.

4) What factors did you have to take into account when planning, shooting and editing?Planning: we had to take into account the amount of time we had to shoot, how difficult our set would be to set up and what resources we had at our disposal. Seeing as we only had an hour to shoot, we opted to keep our sequence simple, and decided to shoot within the Media Block. This meant we had to get permission to use PA7, and had to negotiate with other groups to use the foyer.
Shooting: when shooting, we had to make sure the lighting was correct, and that we kept within the allotted time. We also had to make sure our shots were framed correctly, as well as abiding to the 180° and 30° rule. Also, we had to ensure our shots followed the narrative flow, and had continuity by filming Josh completely walking through the door, for example.
Editing: we had to make sure there was match on action, narrative flow, continuity, audio syncing

5) How successful was your sequence? Please identify what worked well, and in hindsight, what would you improve/do differently?
I think our sequence was quite successful, as we fulfilled the demands of the brief. We matched the action of Josh walking through the door and sitting down, and made sure the eye lines matched. We also made sure the audio was synced with the video.
In hindsight, I think we should have had a bit more dialogue between the characters so as to ensure we had completely fulfilled the brief. Also, when Josh walks in through the door and out of the frame, which then cuts to a close up, we should have edited this differently, as it is quite disorientating for the audience to watch Josh go out of frame, only to be bombarded with him straight after. However, we weren't able to cut the clips together this way as we didn't have the right shot, so in hindsight I think we should have planned that part out in more detail so as to ensure we got the right shots.

6) What have you learnt from completing this task? Looking ahead, how will this learning be significant when completing the rest of your foundation coursework, do you think?

In completing this task, I have learnt how to plan a shoot well enough so that any problems, such as time keeping, can be avoided. I have also learnt about match on action and the 180° and 30° rule. This learning will be significant, as it will aid me and whoever is in my group to make sure our shoot goes ahead with as little hitches as possible. It will also help us make the opening with correct continuity so we can suspend the disbelief of the audience, and create a seamless sequence, using some of the many other theories we learnt, such as shot/reverse shot.

Thursday 3 October 2013

Art Of The Title Grid


1) Summarise your film idea. Provide a brief synopsis and outline what happens in your film opening.


Three best friends compete for the attention of the school's new heartthrob.

In the opening, the three friends see the heartthrob for the first time, which leads to them fighting over him.

2) What kind of information has been included in your film opening?
In our opening, we have included the setting (a school), the main characters (the friends and the heartthrob), the character relationships, the genre (teen rom-com), the actors and the film title (The Competition).

3) How do the titles link to the main film idea?
The font itself is quite 'high school' style, conforming to the genre of a teen rom-com, as well as the fact that the titles would be stamped onto the shot.

4) Summarise the expected audience reaction. What should the audience be thinking by the end of your opening? Is your opening clear or ambiguous?
The audience should be curious about the heartthrob, which is brought on by the fact that he is slowly revealed throughout the opening. The audience should also laugh at the reactions of the girls, such as the fainting or the fighting.
At the end of the opening, the audience should be wondering who will win the 'competition', who the heartthrob will choose, and whether the girls' friendship will survive.
Overall I think the opening is quite clear as the characters and setting are established, as well as the genre, through the exaggerated stereotypes and reactions.

5) Identify three things that you included in your grid that are important in the construction of an opening sequence and explain their role in understanding the film.
Master shot - this establishes the setting and characters of the film
Slow reveal - this creates build-up and tension, as the audience are curious about who the character is. This also highlights the fact that this character is important to the film.
Close Ups of the girls - this also establishes who the main characters are of the film, and also shows them in more detail than the master shot, so the audience gets more of an idea about their characteristics.

How effective is your project as a film opening? Explain your answer.
Overall I think the opening is quite effective, as it gives the audience what they would expect from a teen rom-com, such as over-exaggerated expressions and the vibrancy and lighting, as it is bright and colourful, much like other teen films. The opening also gives the audience the information they need, such as the characters, the setting and the character relationships. For example, the costumes give the audience some idea of what the characters are like, as they are stereotypical of different groups of teenagers, such as the 'nerd' costume, with the glasses and 'bad' hair.
In hindsight, I would change a few things to improve the opening. Firstly, I would change the hair colour of the 'barbie' character to blonde, to reinforce the stereotype and make it more blatant as to who the character is. I would also have the corridor more full, to make the setting more realistic.