


RESEARCH AND PLANNING
WEB 2.0
- Facebook - We initially made a group, which included all four members. This was extremely useful for us as it meant we were able to communicate with each other easily, such as organising group meetings or deciding on costumes.
 |
| Each member can post in the group, and all the others members can see and comment on the post - this meant we were able to discuss issues and ideas even when we weren't together in person. |


We also used it to share photos from the shoots, publicity shots, and initial costume ideas.
 |
| We organised and posted reminders about group meetings in school. |
- YouTube - We took advantage of the technological convergence, and used YouTube to watch inspirational music videos, and research references for eras - for example, we watched clips from Grease to get costume ideas and dance moves:

- Pinterest - We used this website to bring together reference images for the different era costumes, as well as the band image. This was extremely useful as it meant we could easily look to a collection of images when deciding on final costumes.

MOBILE PHONES
We were also able to take advantage of technological convergence by using our mobile phones, which are also portable devices. Firstly, I was able to use my mobile phone to communicate with our lead actor, Jacob. I would send him reminders about shoots and costumes to make sure that he knew what was happening with each shoot:

 |
| We could also use our phones to post on the group Facebook page, and to see what other members had posted. This was useful when we were away from computers, as it meant each group member could stay up-to-date easily due to our phones being portable devices. |


We were also able to use our mobile phones as cameras, to take photos of and film the research and planning process. For example, we took photos of the casting process (middle image). We could then refer to images when discussing ideas and issues.
CONSTRUCTION - PRODUCTION
CANON 5D MARK II
When shooting, we used the Canon 5D Mark II, as it shot in 1920 x 1080p, in 16:9 aspect ratio, and had HD video capability. I had never used this camera before for filming - I had only used it for taking still images for coursework in Year 11. However, the camera was easy to use once our Media Technician had explained what to do, and we found that the camera was the best choice for us, as we could also adjust the white balance and contrast on the camera itself when shooting, meaning we got the best possible footage from each shoot.
 |
| However, one problem we found with the camera was the focusing. It was manual focus, which meant that it was vital we focused each shot properly before shooting, which didn't always happen. This led to quite a few reshoots, although we were much more aware during these shoots. |
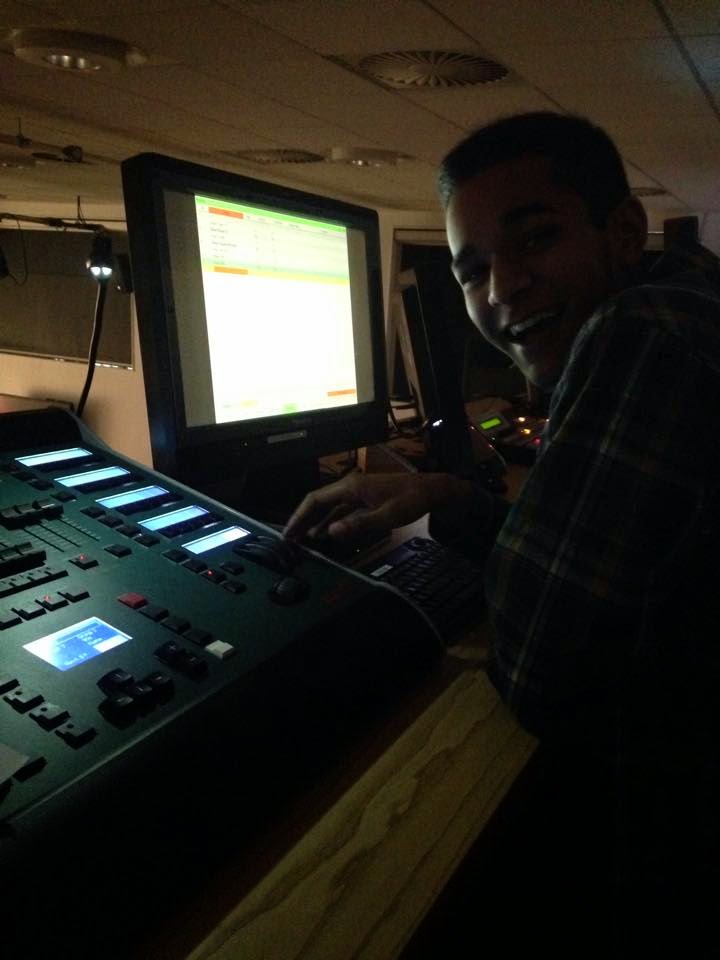 For the lighting, we used a Leapfrog Lighting Desk, which controlled the Arri 1000K Lights in lighting rig with colour filters.
No one in the group had used the lighting desk before, so we were taught by the Media Technician before we began shooting, where we were able to make pre-set lighting settings that we could quickly select during shoots. Being able to control the lighting meant we were able to light the shots how we wanted to; for example we were able to choose what colours we used for each era background. We had to compromise one colour choice as it was not available in the filters, but we were able to decide on a different colour quite easily as there was still a large enough range that there were noticeably different colours for each era.

One problem we had with the lighting rig was how long it took to change the lights for each set up - because we were sharing the studio with other groups, we had to move the lights before each shoot, as different groups had different lighting set ups. This meant a lot of time was wasted at the beginning of each shoot. However, this was unavoidable, so we had to just light as quickly as possible without compromising quality.
CONSTRUCTION - POST-PRODUCTION
PREMIERE PRO
Editing
To edit our footage we used Premiere Pro - personally, I had used this programme before, not only at school for coursework (such as the film opening last year), but also outside of school as I have self-taught myself many editing techniques. Premiere Pro was very effective when editing the video, as we could do non-linear editing, meaning it didn't matter what order we edited our footage in. Premiere Pro was also useful as we could have multiple sequences when editing, so we could test out editing techniques on a separate sequence from the final edit.
I did, however, learn a new editing technique when editing the last dance sequence. After feedback, we decided as a group to make the editing different in the second dance sequence from the first, to ensure variety within the video. This was the first time I had done a split screen effect in Premiere Pro. It was much more simple than I had initially thought; we used the Crop effect as well as the Motion settings in the Effect Controls tab, which we used to move and cut down each shot.

We tried to split the screen horizontally, so that our characters were made up of two bodies to highlight that the video was about how love transcends time. However, this effect didn't work at all, due to each dance in each take being in slightly different places. This was incredibly disorientating, along with the fact that the characters appeared to have more than one arm, such as in the screenshot below, where Jacob appears to have two left arms, and disjointed legs.

Grading
We also used Premiere Pro to grade the footage. I found this much less difficult than the split screen effect, because I have had a lot of practise with grading. However, it was quite time consuming to try and maintain a consistent look throughout the whole music video.
 We used:
- Procamp, to edit brightness, contrast and saturation
- Three Wheel Colour Correction, to colour correct shots, such as making skin tones less yellow in the band shots for example
- Change Colour, to change certain colours, such as making the whites more pure in the band shot
On the left is ungraded, on the right is graded.
However, we had to use After Effects to grade the 80s narrative scenes, as the grading software in Premiere Pro was not advanced enough to successfully colour correct the footage.
I personally had never used After Effects for grading before, although I had some experience in using it for layer masking and tracking from both editing at home and for coursework last year. It was quite difficult at first, but once I had spent some time on it, I feel I was able to mostly correct the footage to a standard that fit with the rest of our video.
 |
| I used Colour Finesse 3 to grade the footage. |
On the left is graded, on the right is ungraded.
To edit the album art we used Photoshop. I have prior experience in using this software, again from both school and home, so I was confident when using it.
For the band logo, which we chose to use as the front panel, I tried an effect that I had never done before, and followed a tutorial I found online:


 |
| This was the final product - as a group we all liked this effect the most out of all the effects I tested out for the band logo. Below are two examples of the 'metallic gold' text effect that I also tried. |


However, in hindsight, I feel like we could have used a different effect that was more versatile, as the neon outline effect only worked on a dark background, which led to us being very limited in what we could do in terms of design.
We also used Photoshop to edit the photos for the album art and website:


Above are two photos - on the left is the edited photo, and on the right is the unedited photo.
I tended to be the one editing photos, as I had the most experience with Photoshop, and I had access to the software at home, so I could use my time at school to edit the video. The tools and adjustments I used were:
- Brightness & Contrast - this was useful for brightening shots where the lighting was too dark, and making the shadows more prominent, in order to make photos more dramatic and eye-catching.
- Vibrancy - I used this to make the colours more rich
- Spot Healing Brush Tool - I used this to remove any blemishes and marks on the skin, to make the band appear more flawless, and to make the photos look like real professional photos
- Overlay Layer with Burn and Dodge Tool - I used this to darken and lighten parts of the photo that were incongruous with the rest of the photo - for example, I darkened Brandon's skin tone in the photo below, as unedited it was not a realistic representation of his actual skin tone

- Wix - to make our band website, we used Wix, a free site for creating your own website. This was good technology for us to use as it was designed to be easy to use, and didn't require HTML coding, which would have been difficult for us to learn how to use. A problem I found with Wix was that we were limited slightly with creativity, as we were only able to use preset widgets and apps provided by Wix. On the other hand, this meant that we could easily add features to our website, such as a live feed of the band's social media pages.


For example, we could easily add as many photos and text boxes as we wanted to each page, and could easily change the settings.
- Facebook, Instagram & Twitter - these social media sites were useful for creating ways for fans to connect with and stay updated about the band. We created a Facebook, Instagram and a Twitter page for the band, which fans can like and follow for information about upcoming events, or exclusive pictures of the band.


EVALUATION
CANON EOS 1100D and PREMIERE PRO
I filmed interviews with our target audience using my Canon camera, and edited it together using Premiere Pro. This was useful for us as it meant the group could hear feedback about all three texts, as well as use it for the evaluation. We also used my camera to take behind the scenes photos during the shoots.
 |
| This is an example of some of the interviews I filmed using my Canon, and edited using Premiere Pro. |
We also used an online survey conductor called SurveyMonkey, which we asked friends, family and strangers (via the internet) to fill out. We shared it on Facebook, and then used the results in our evaluation.

SurveyMonkey was good to use as it was clear for those filling out the survey. We were able to ask as many questions as we wanted and were able to customise the survey to get the best data possible. It also allows anonymous responses, so those filling it out didn't feel pressured to give details they may not have wanted to give.
However, due to SurveyMonkey being anonymous, we did get some answers that were obviously not taking the survey seriously, so we had to disregard the answers. In hindsight, we could have possibly avoided this by asking more people face-to-face, or actually handing out questionnaires.
I found Prezi useful for presenting my evaluation in a different and interactive way, hopefully making my evaluation more interesting. It was simple to use, and was effective at presenting information clearly and concisely. However, Prezi does not support .gif files, which was not useful for if I wanted to explain an example of movement within our own music video or reference videos.
BLOGGER
Using Blogger to present my evaluation answers was also very useful, as I could take advantage of technological convergence and interactivity: I could embed different web tools onto my blog, such as Prezi and Padlet, as well as embedding videos and images. Blogger was also a good platform to use as it supported the .gif format, which I took advantage of:
 |
| An example of a gif I used in my evaluation. |
No comments:
Post a Comment